
Column Base & Anchor Bolt Installation: Setting, Grouting and Tolerances
Column bases transfer the building load into the foundation through anchor bolts cast into concrete. Installation works in three stages: set the anchor bolt cage and template before the pour, verify position and level after the pour, then place the column and grout the base plate. Anchor bolt size, embedment and spacing depend on the loads, the soil and the approved drawings.
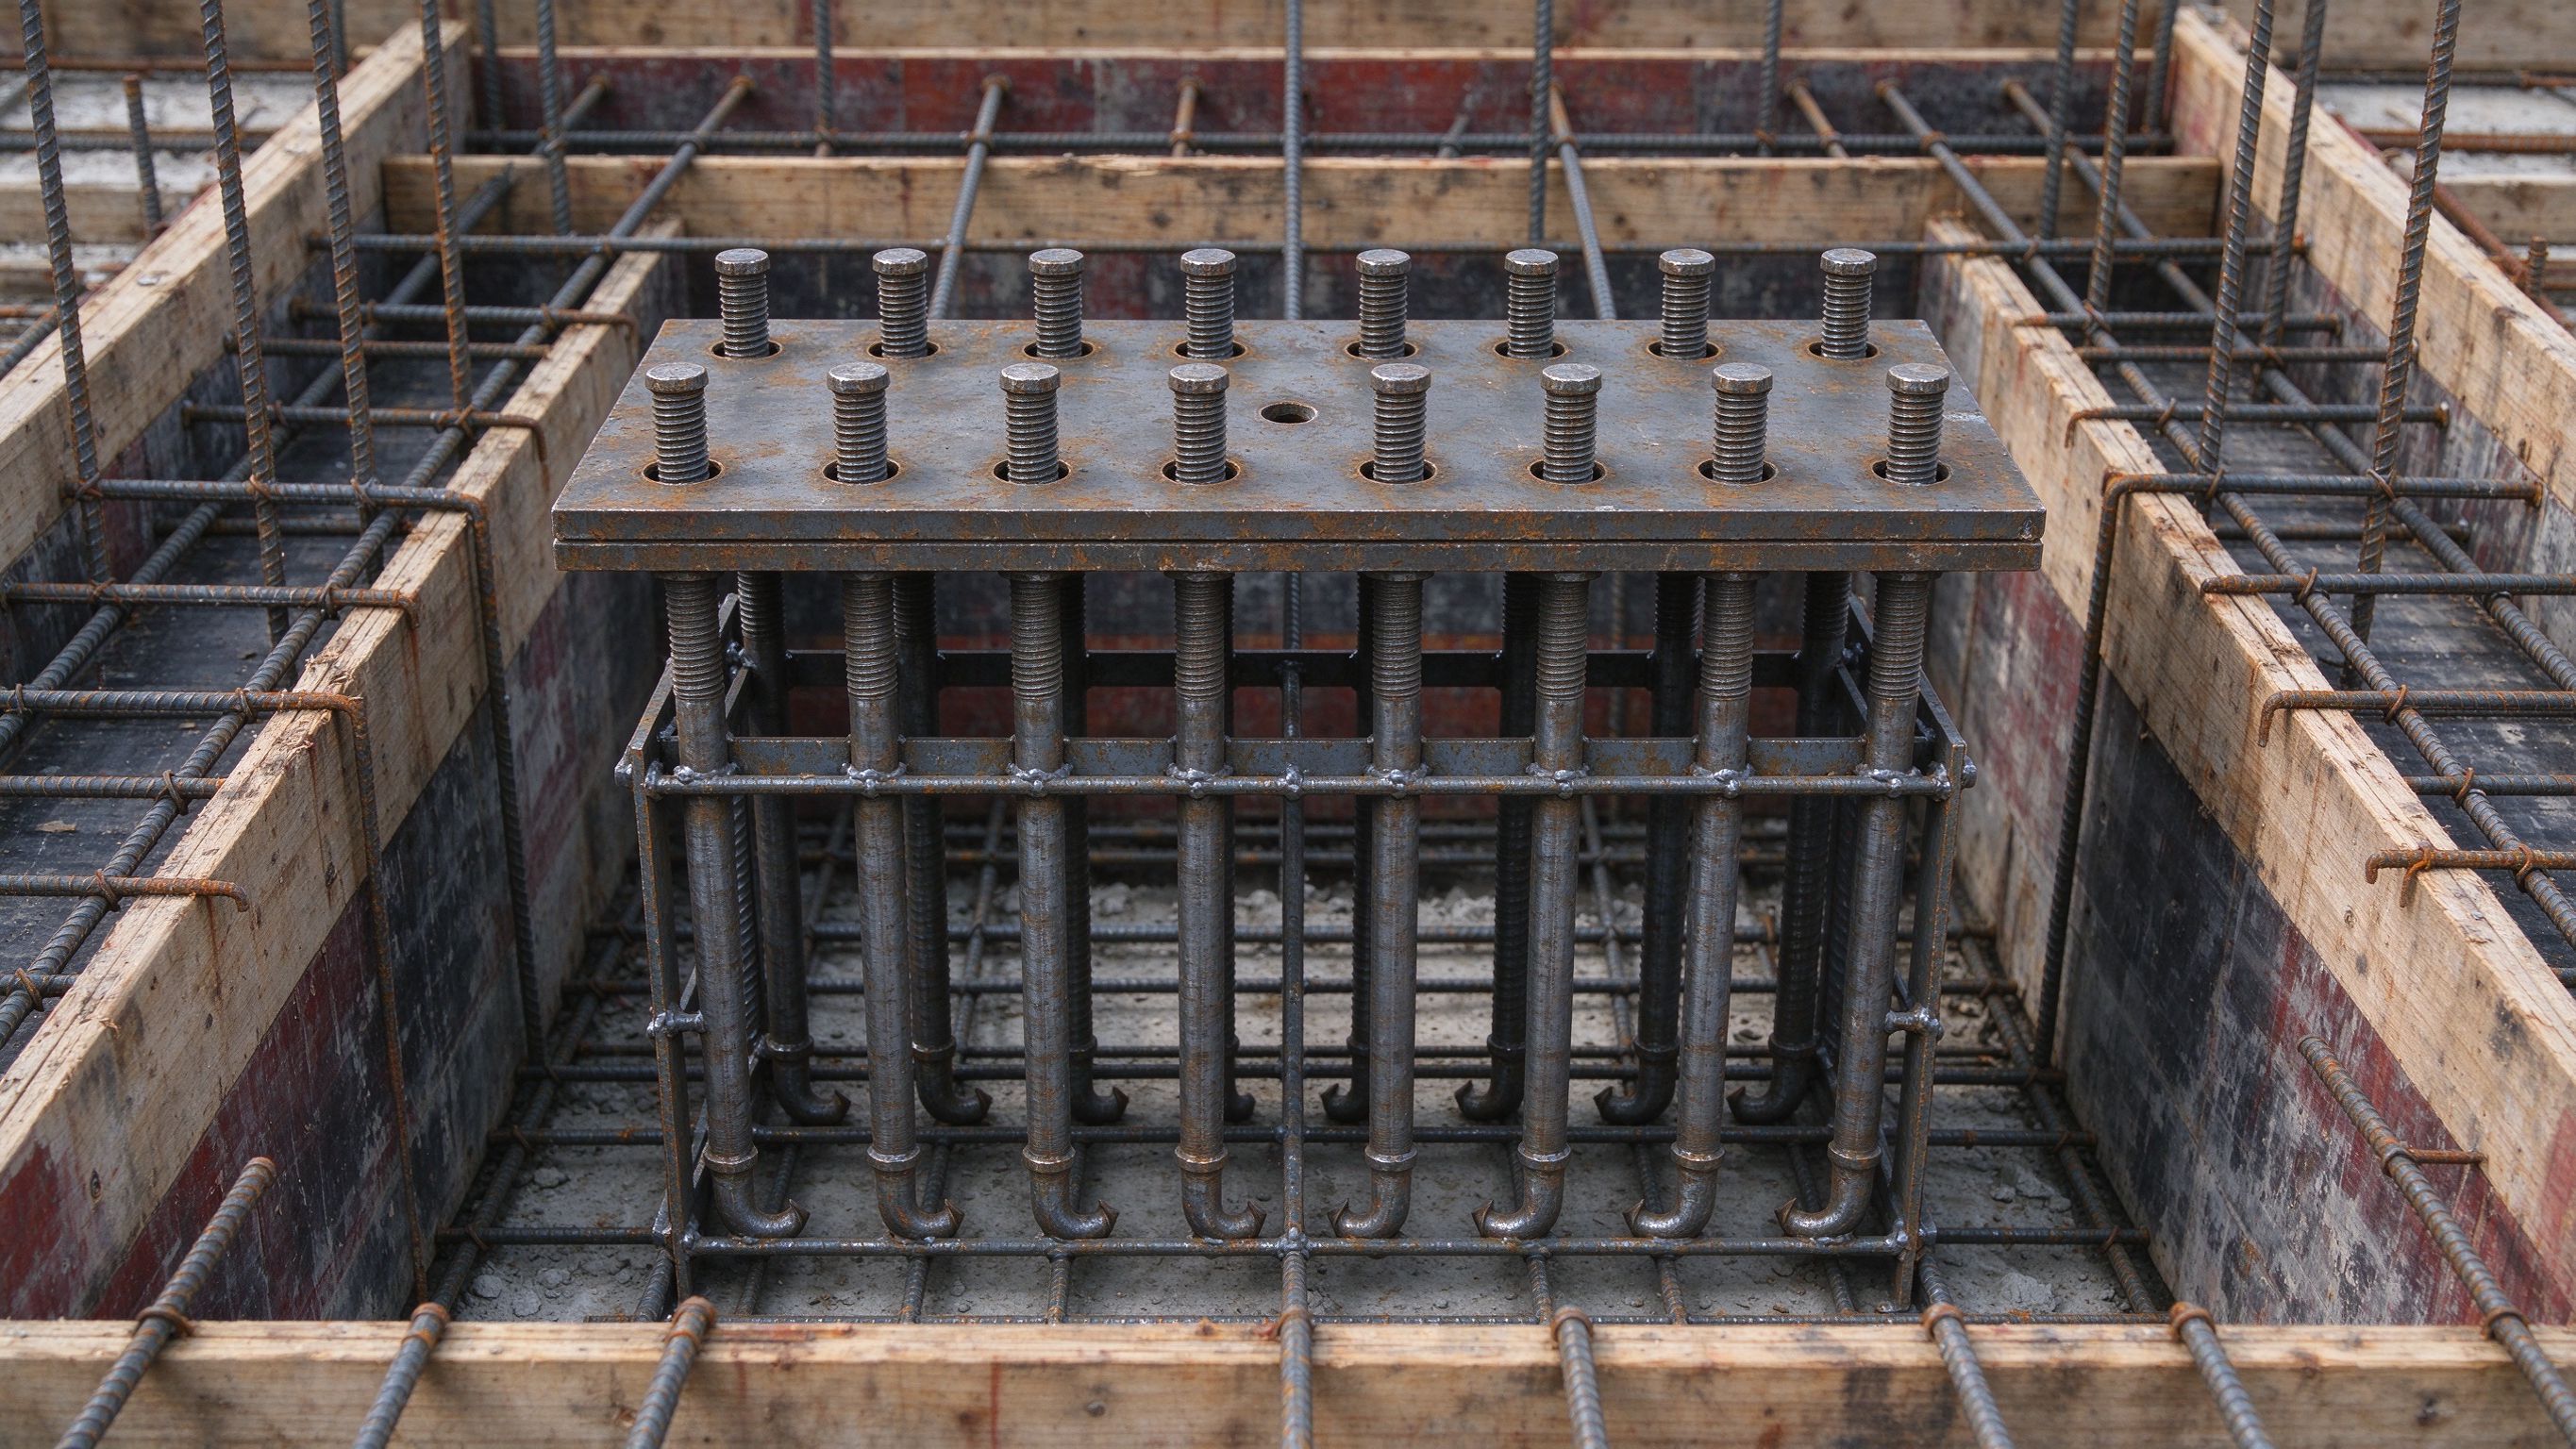
Column bases transfer the building load into the foundation through anchor bolts cast into concrete. Installation works in three stages: set the anchor bolt cage and template before the pour, verify position and level after the pour, then place the column and grout the base plate. Anchor bolt size, embedment and spacing depend on the loads, the soil and the approved drawings. Foundation concrete is poured by the local team; ZhongSai provides anchor bolt layouts and installation technical guidance with the steel scope.
This guide explains the anchor bolt installation sequence, checks and tolerance handling for steel buildings.
Part 1: Why anchor bolt setting matters
Anchor bolts are the only connection between the steel structure and the foundation. Once concrete is poured, bolt position and level are hard to correct:
- Position errors mean the base plate will not fit, or the column will be out of alignment.
- Level errors mean the column base is uneven, affecting column plumb.
- Incorrect protrusion means nuts cannot be fitted or threads are damaged.
- Poor grouting means the base plate load is not fully transferred to concrete.
The cost of getting bolts right before the pour is far lower than correcting them after.
Part 2: Anchor bolt types and components
| Item | Typical use | Notes |
|---|---|---|
| Straight anchor bolt | Standard column bases | Threaded top, hooked or embedded end; size per design |
| L-shaped / J-bolt | Where pull-out resistance is needed | Hook improves embedment; per approved drawings |
| Anchor bolt cage | Group of bolts tied together | Keeps bolts aligned and level during the pour |
| Setting template | Positioning the bolt group | Steel or plywood template at the top of the cage |
| Leveling shims / nuts | Adjusting base plate level | Temporary support under the base plate before grouting |
| Grout | Filling under the base plate | Non-shrink grout; thickness per spec |
Bolt size, embedment depth and spacing come from the approved drawings and depend on the loads.
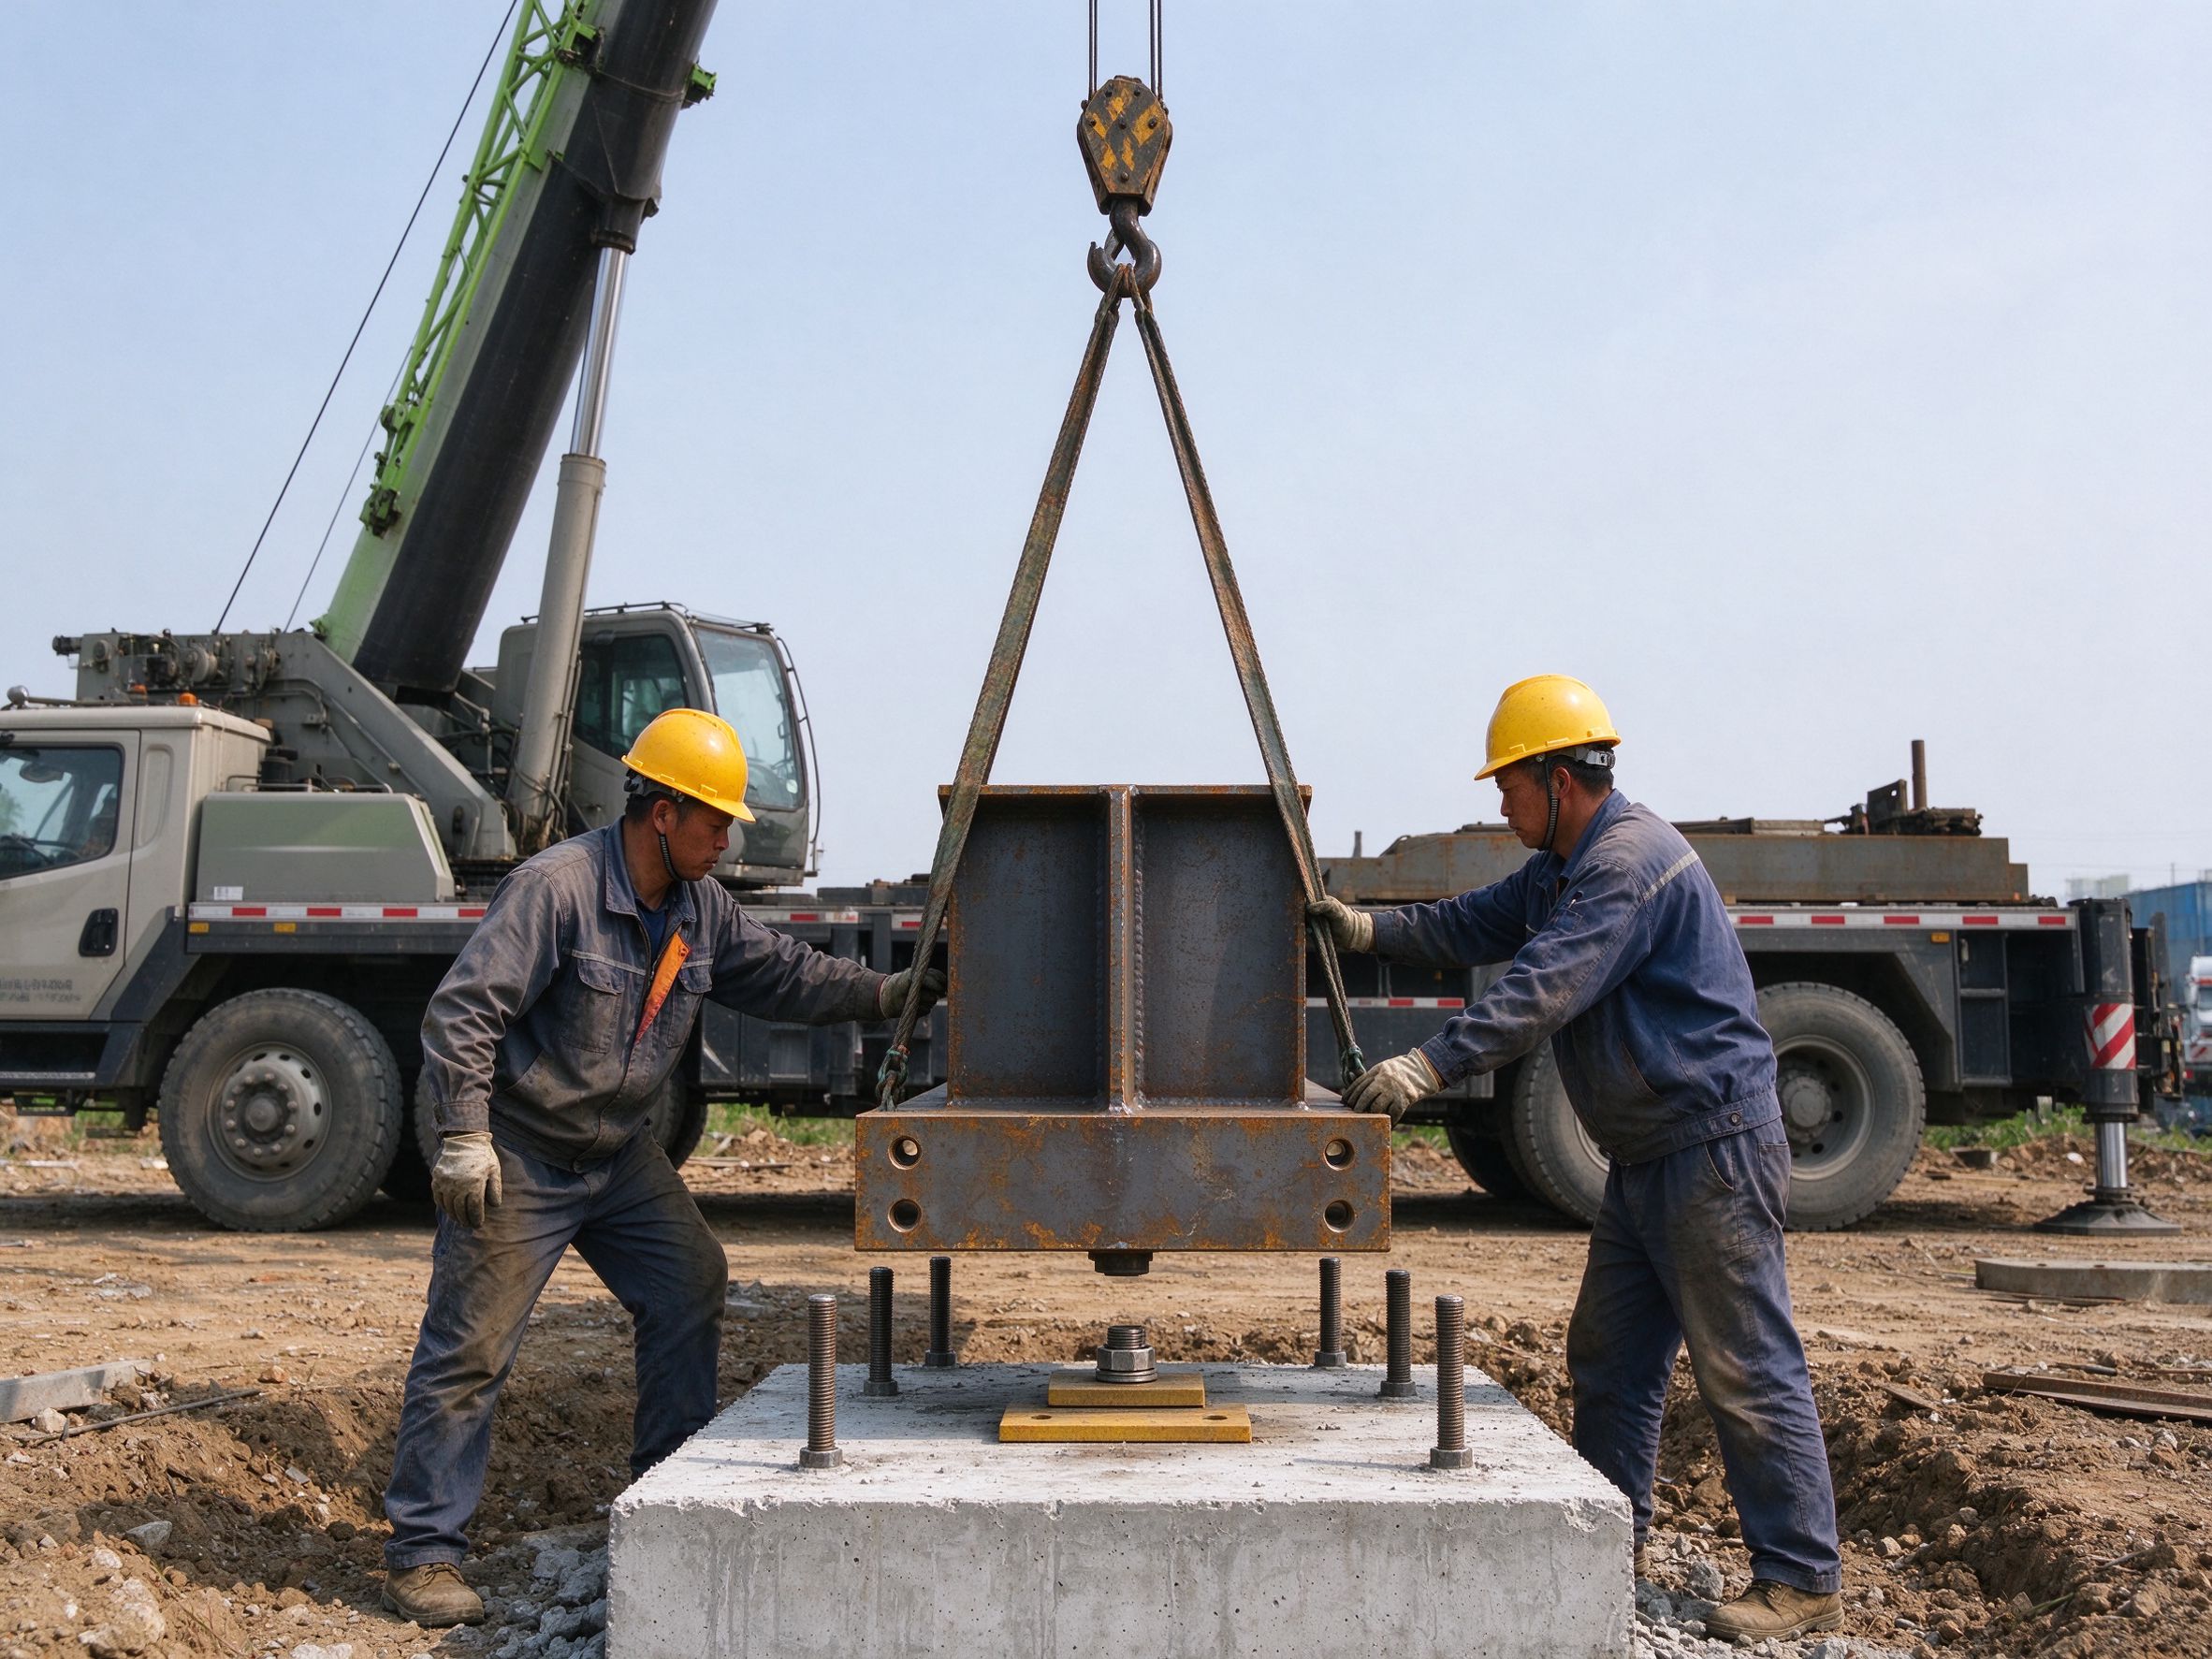
Part 3: Installation sequence — before, during and after the pour
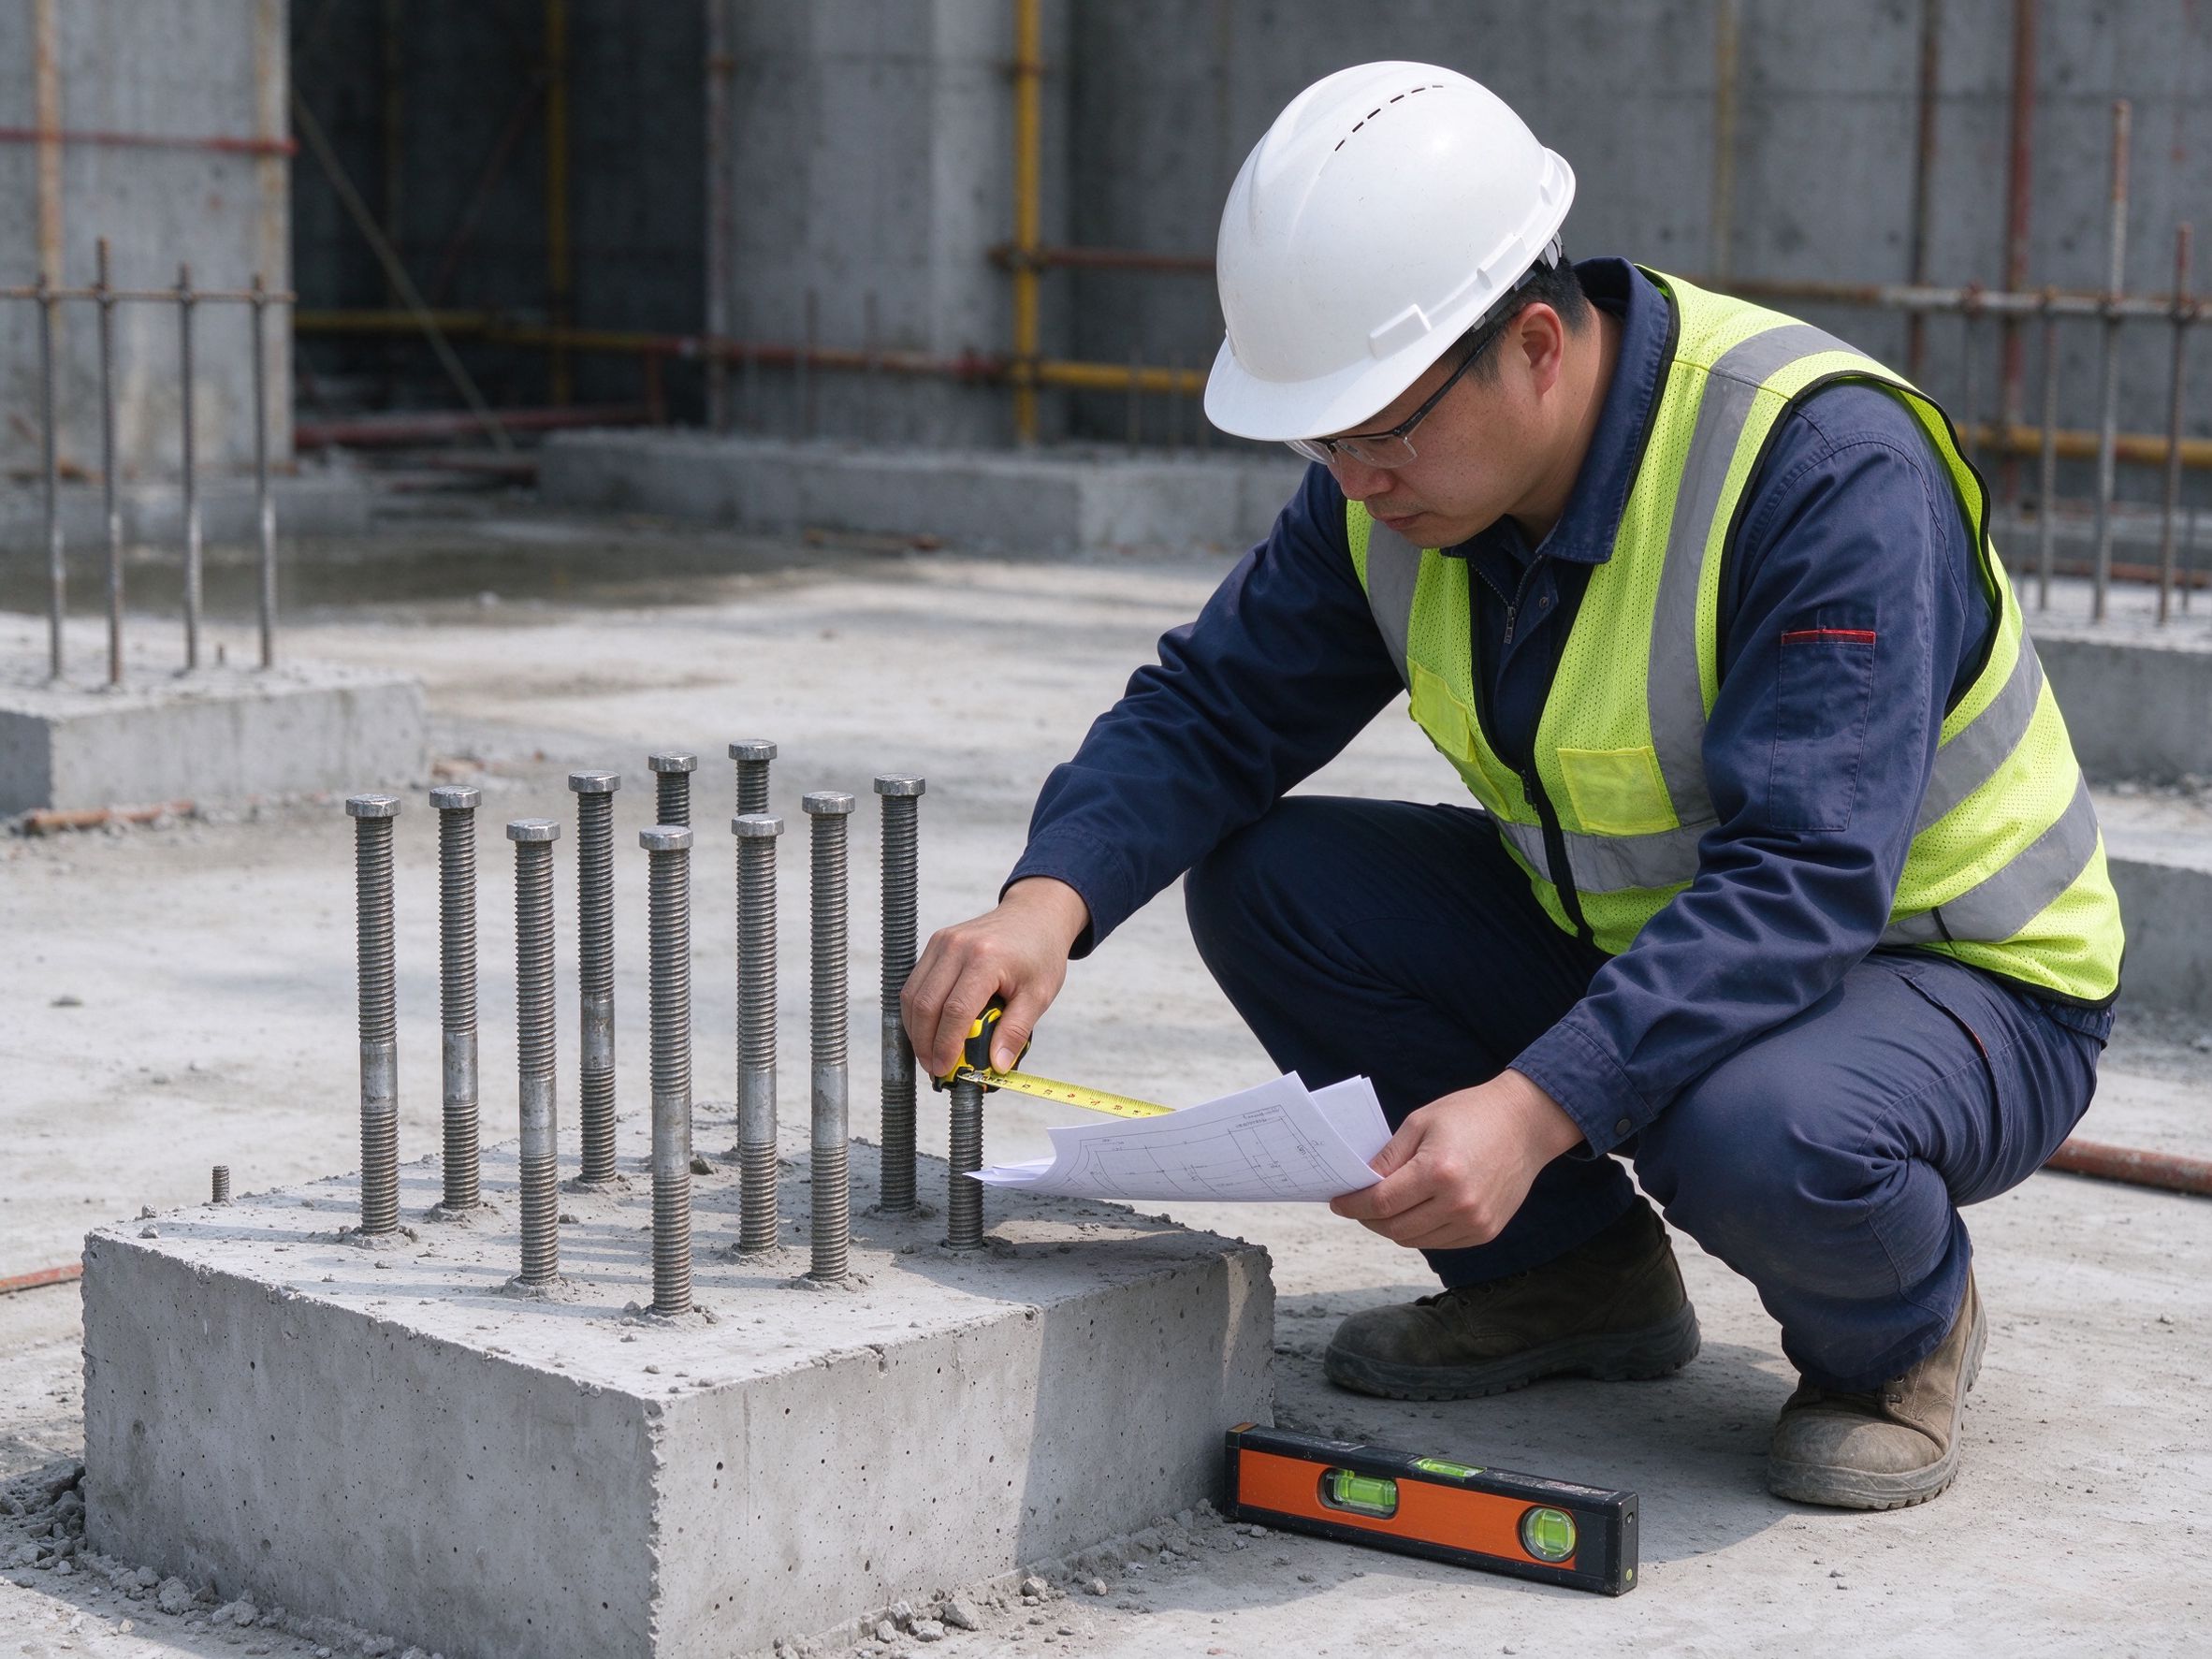
- Check the drawings — confirm bolt diameter, embedment, protrusion and group spacing.
- Build the bolt cage — fix bolts to the cage frame with the correct spacing and level.
- Set the template — position the cage in the formwork using the setting template; check plan position and level.
- Hold in place — brace the cage so concrete placement does not move it.
- Pour concrete — avoid direct impact on the bolts; check again after the pour.
- Verify after the pour — check position, level, protrusion and thread condition while concrete is still workable.
- Correct while possible — small adjustments are easier before concrete hardens.
- Protect threads — cover exposed threads before further work.
Part 4: Tolerance handling after concrete hardens
- Small position errors — confirm against the drawings; base plates with standard holes may allow minor adjustment.
- Protrusion too long — check available nut height; add washers or adjust per design.
- Protrusion too short — do not cut or weld bolts without design review.
- Level issues — leveling nuts, shims and grout correct base plate level; confirm thickness per spec.
- Damaged threads — re-thread carefully or repair per spec; replace only with design approval.
If errors exceed the allowable tolerances on the drawings, stop and confirm the correction with the designer before proceeding.
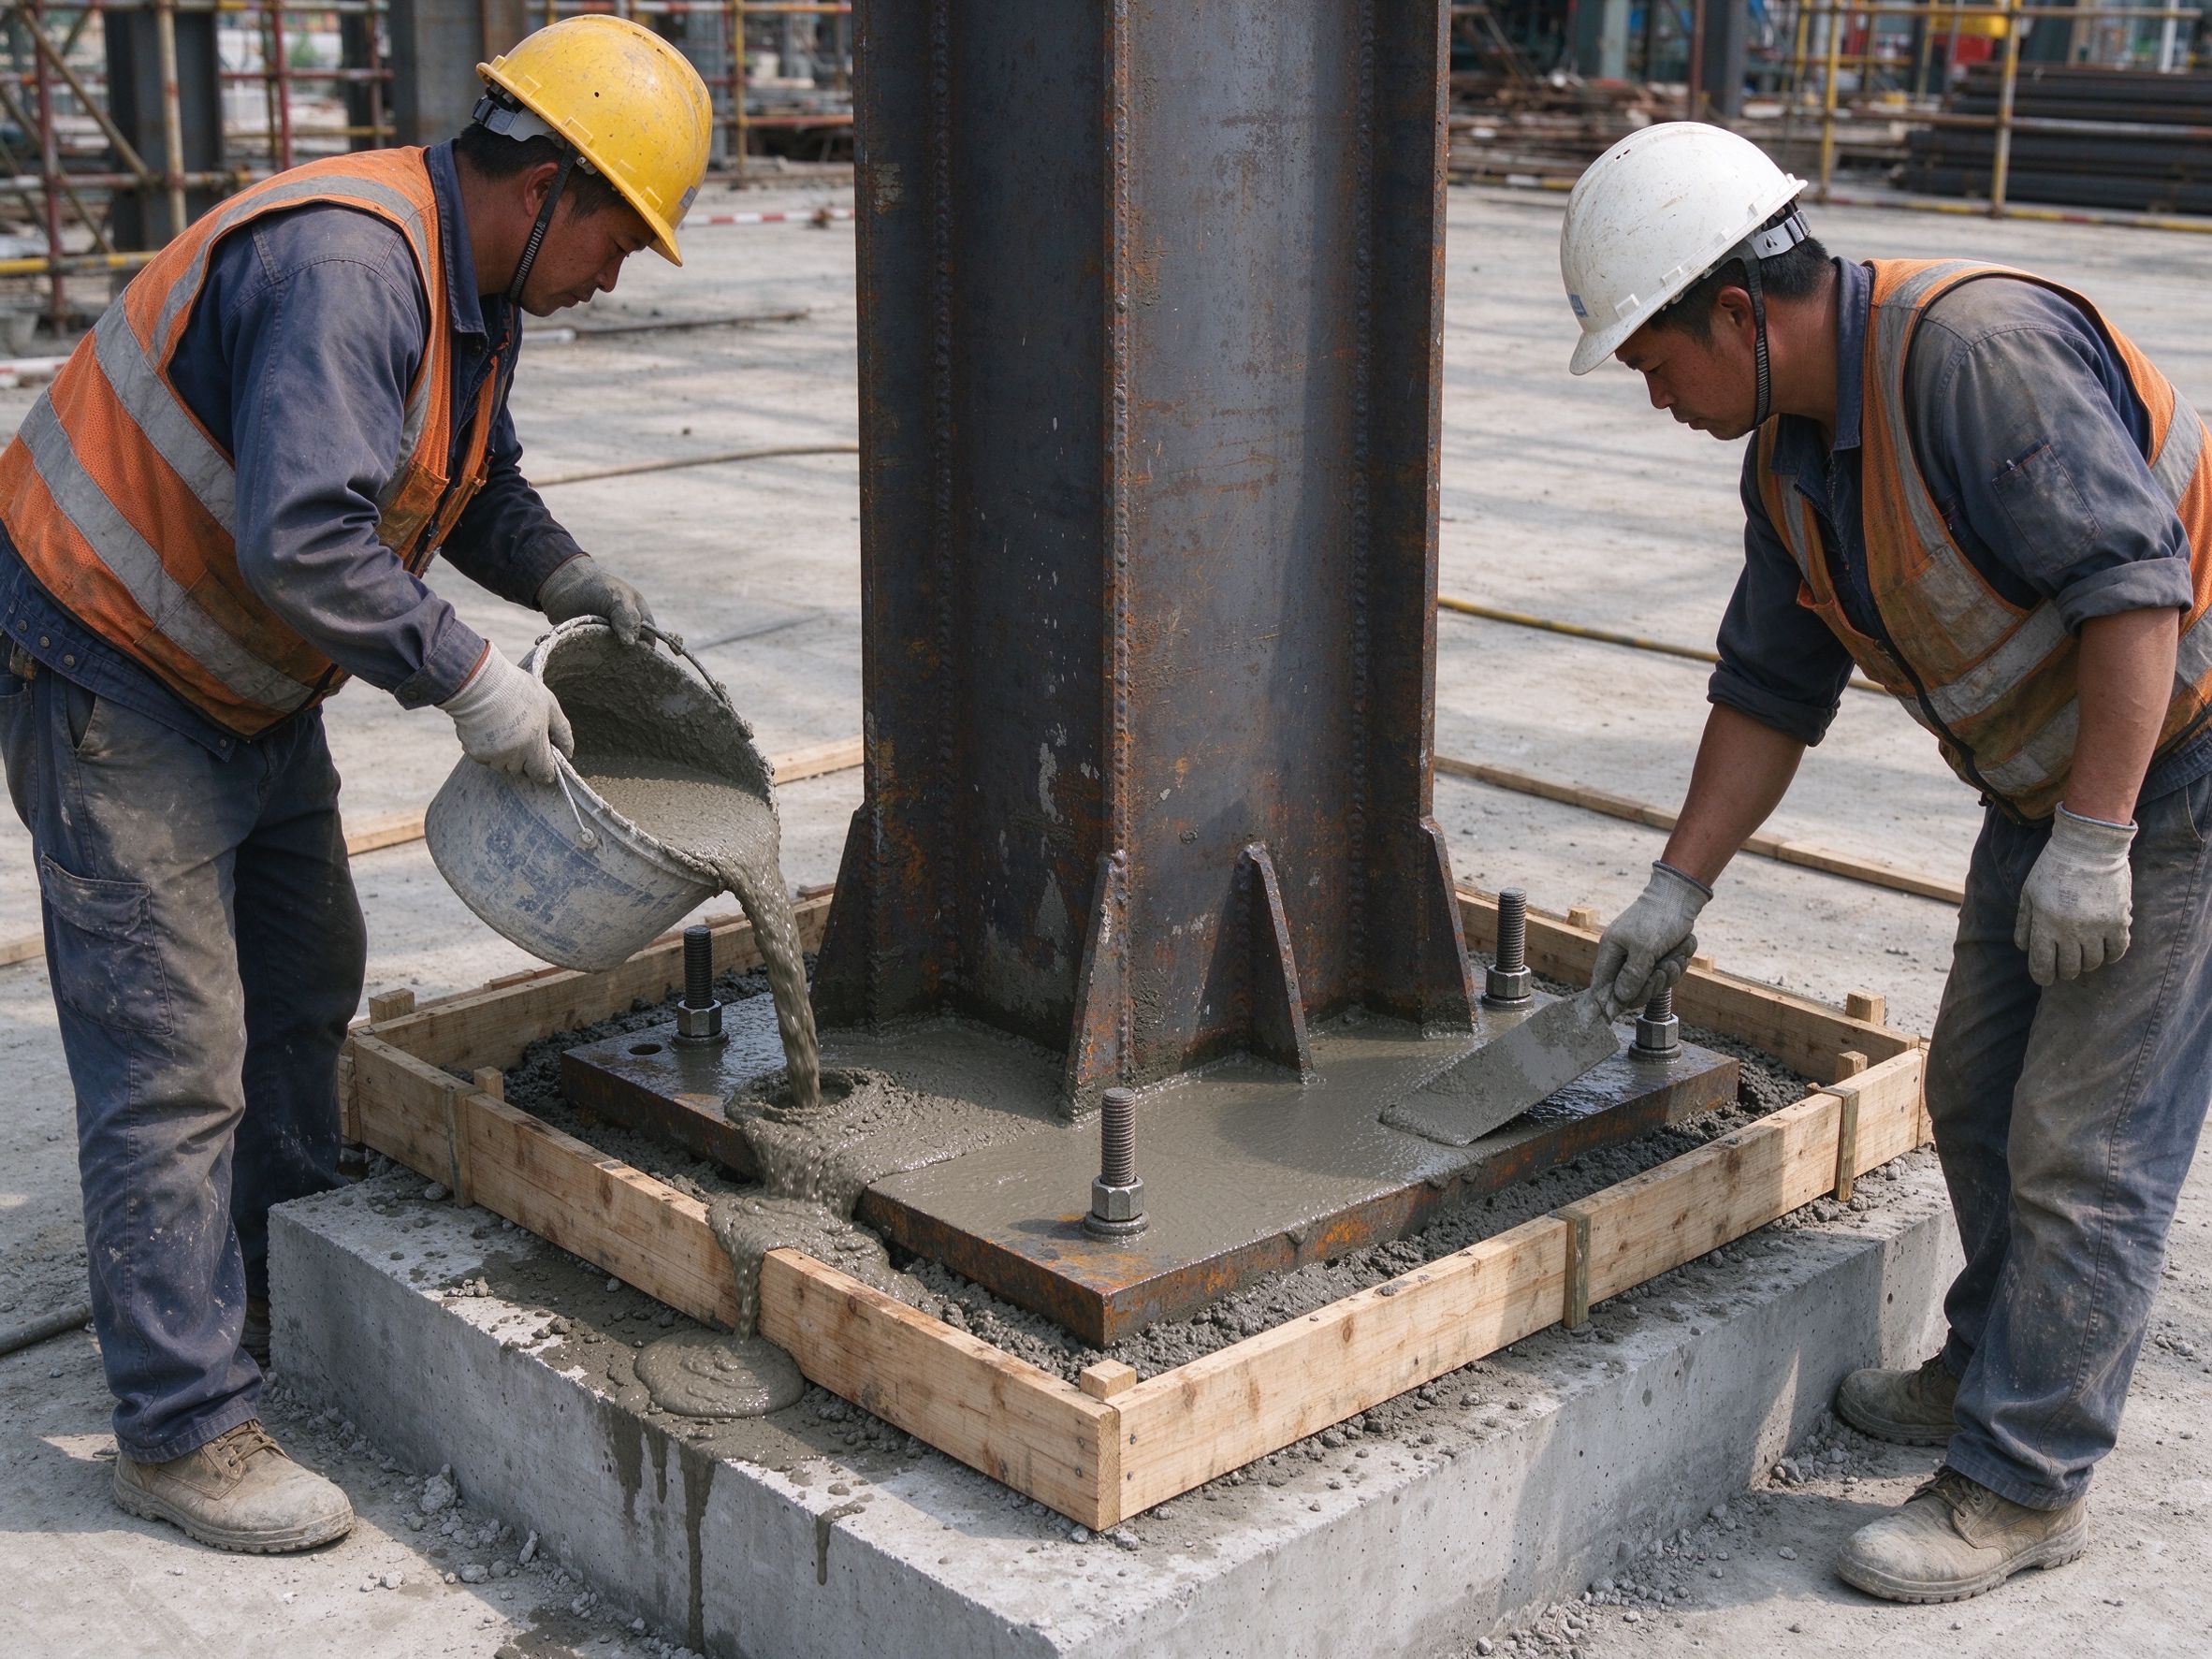
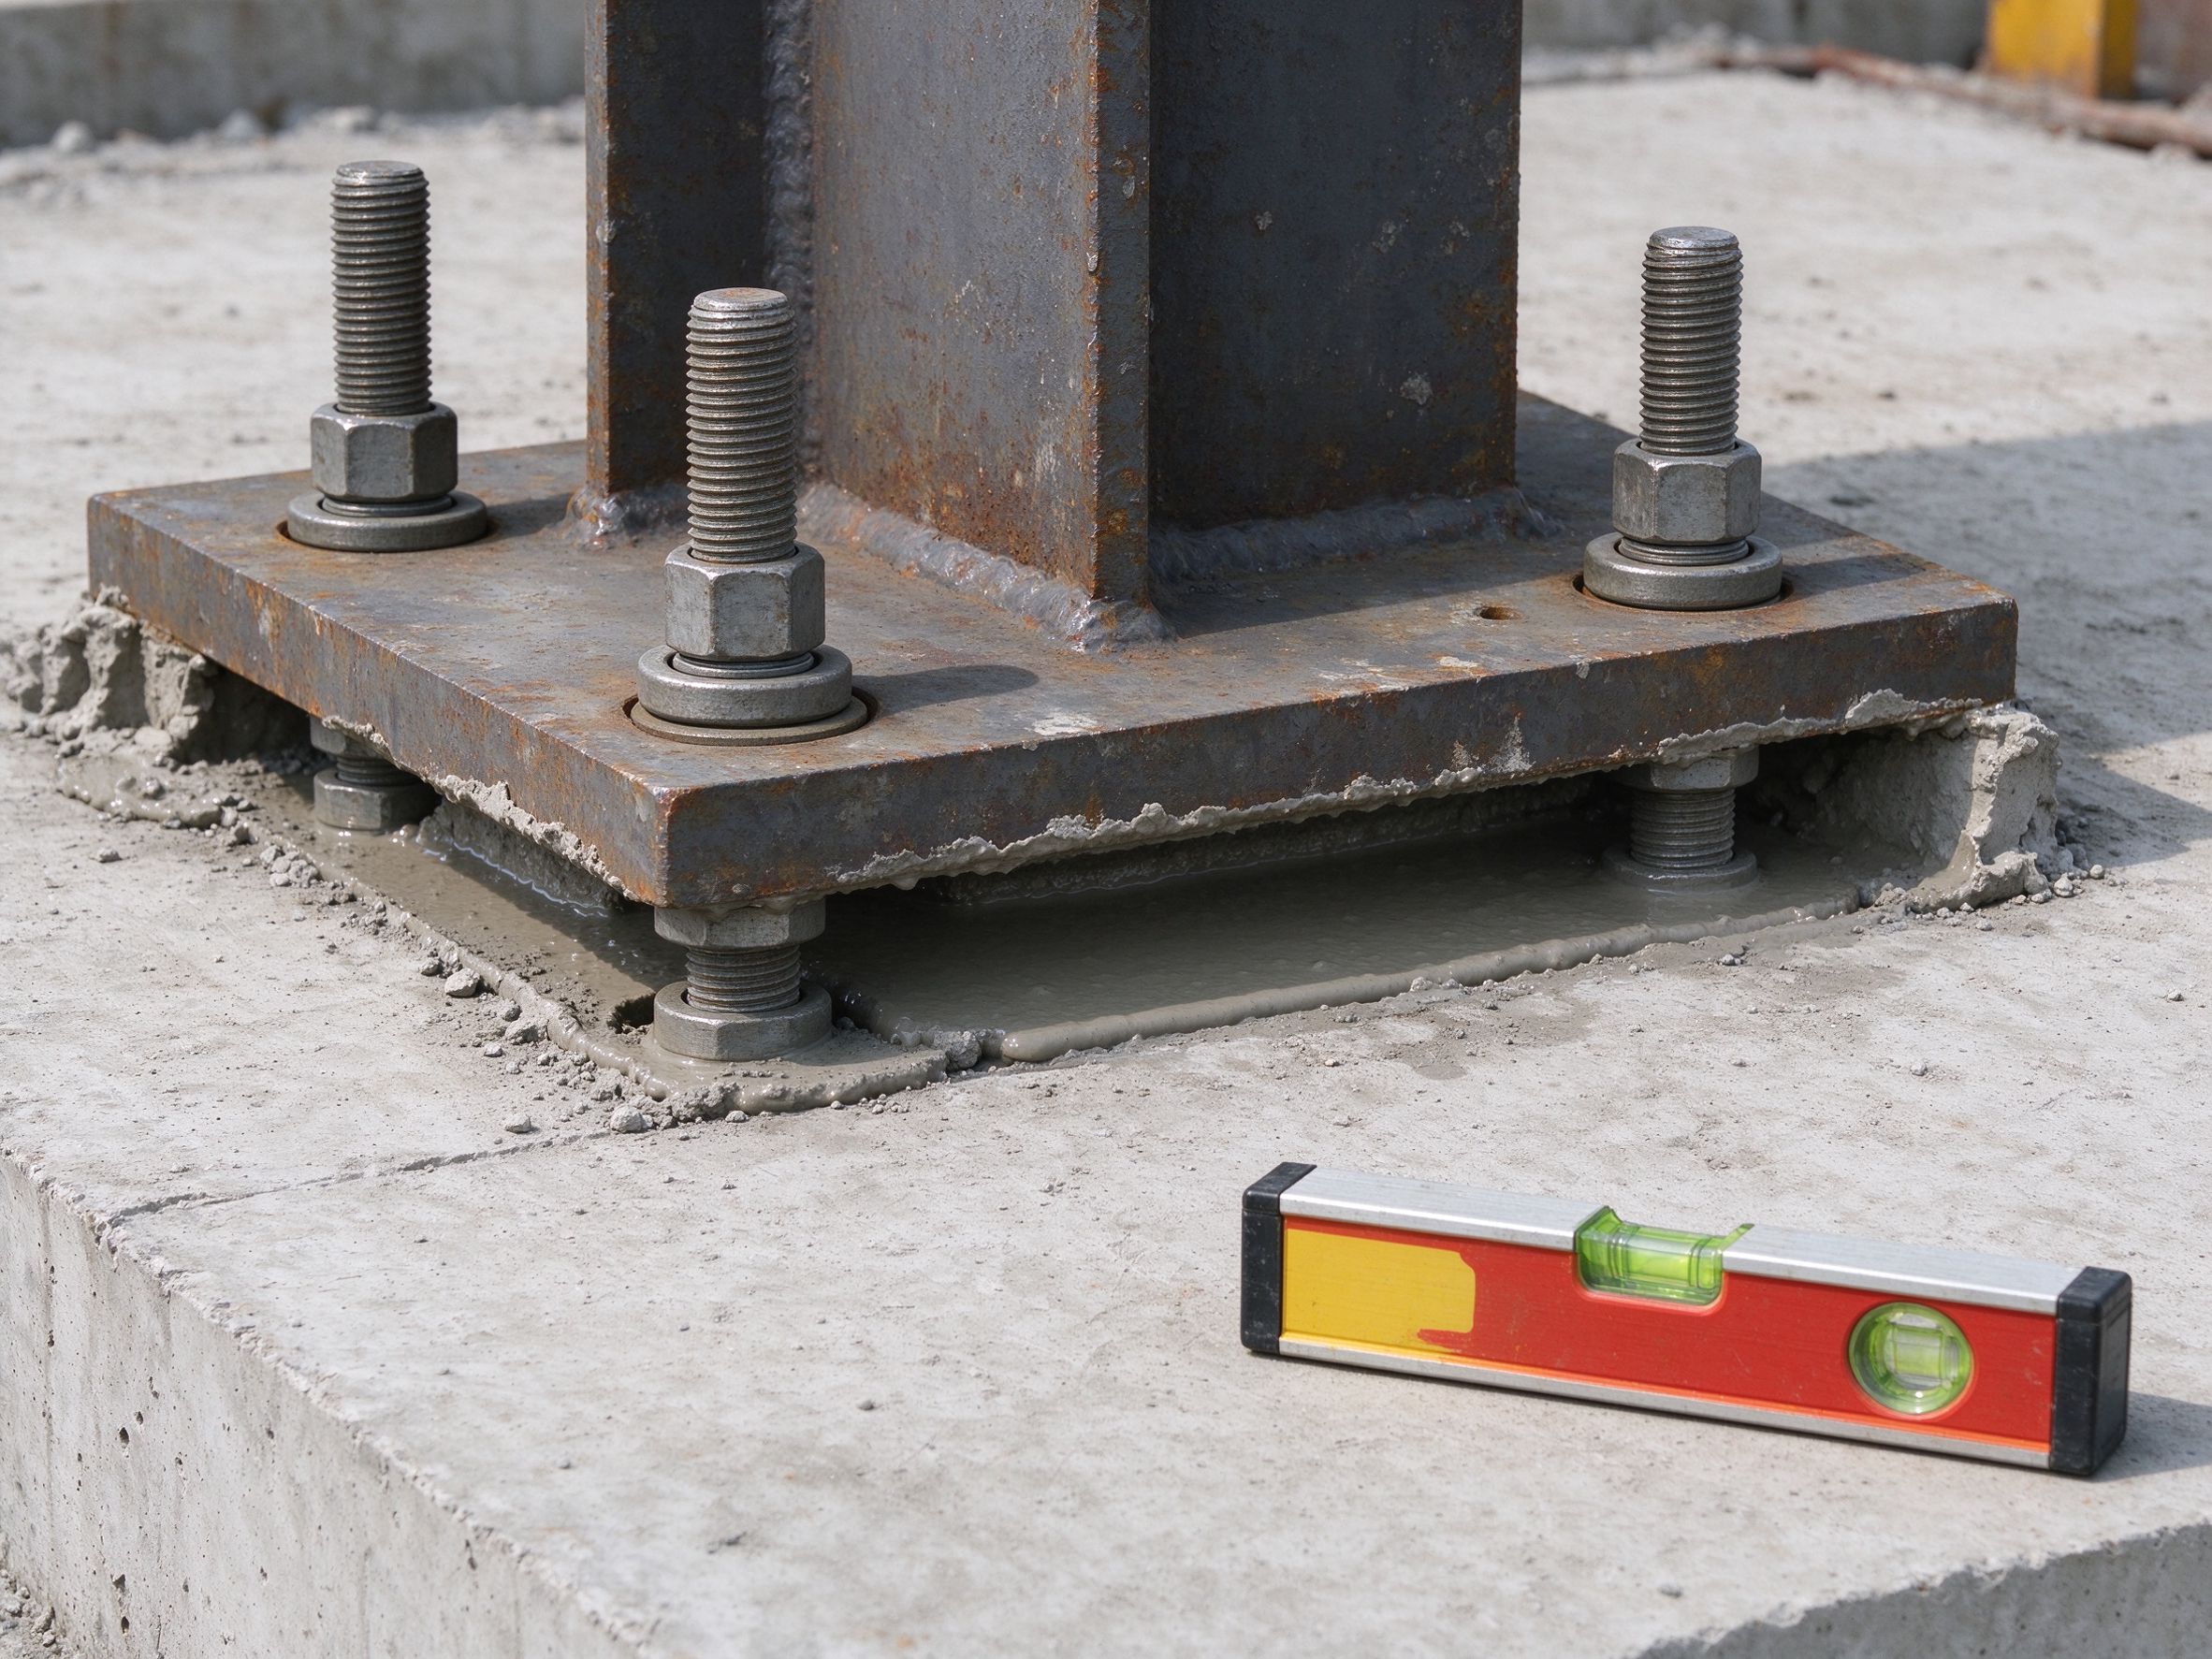
Part 5: Grouting the base plate
- Clean the base plate underside and the concrete surface.
- Build a grout form around the base plate edge.
- Mix non-shrink grout per the product spec.
- Pour or pump grout from one side to avoid air pockets.
- Fill completely and finish level with the base plate edge.
- Keep the grout damp and protected during curing per spec.
Part 6: Buyer checklist
- Confirm anchor bolt size, embedment, protrusion and spacing on the approved drawings.
- Confirm who supplies anchor bolts: with the steel scope or from local stock.
- Confirm setting responsibility and the setting template supply.
- Confirm grout type and thickness with the designer.
- Check bolt group position and level before the concrete pour.
- Check protrusion and threads after the pour.
- Grout the base plates only after the column is aligned and level.
- Keep records and photos of the setting and grouting steps.
Part 7: Responsibility boundary — supplier vs local team
| Stage | ZhongSai (steel supplier) | Local team |
|---|---|---|
| Design | Provides anchor bolt layouts and base plate details | Confirms foundation design with the registered engineer |
| Supply | Fabricates anchor bolts and base plates per spec (if in scope) | Procures grout and any local bolts not in scope |
| Setting | Provides installation technical guidance | Sets cages, templates and pours concrete |
| Checks | Provides documentation of supplied items | Verifies position, level and protrusion on site |
| Grouting | Provides grouting guidance | Executes grouting and curing |
FAQ
How are anchor bolts installed for a steel building?
In three stages: set the anchor bolt cage and setting template in the formwork before the pour, verify position, level and protrusion after the pour, then place the column base and grout the base plate. Sizes and spacing come from the approved drawings.
Who supplies anchor bolts?
Anchor bolts can be fabricated and supplied with the steel scope, or sourced locally. Confirm the supply scope in the contract. Foundation concrete and grout are typically local.
Why is a setting template used?
The template holds the bolt group at the correct spacing and level during the pour. Without it, bolts move during concrete placement and the base plate will not fit.
What happens if anchor bolts are out of position?
Small deviations can be checked against the drawings — base plates with standard holes allow minor adjustment. If errors exceed tolerance, stop and confirm the correction with the designer. Cutting or welding bolts without design approval is not recommended.
What is grouting under the base plate?
Non-shrink grout fills the gap between the base plate and the concrete, so the load is fully transferred. Thickness and mix follow the spec; pour from one side to avoid air pockets.
How much do anchor bolts protrude above the concrete?
The protrusion depends on the bolt size, nut height and any washers, and is shown on the approved drawings. Too little means the nut cannot fit; too much wastes thread and may interfere with the base plate.
Can base plate level be corrected?
Yes — leveling nuts, shims and grout adjust the base plate to level before grouting. The grout thickness must stay within the spec.
Do I need a registered engineer for foundations?
Foundation design, concrete and anchor bolt checks are usually the responsibility of the local registered engineer and the local team, following the local code. The steel supplier coordinates the anchor bolt layout with them.
Need anchor bolt layouts for your foundation design?
Send your foundation drawings and column layout, and ZhongSai will coordinate the anchor bolt and base plate details with your engineer.